Speed Up u-blox GPS Time to Fix with AssistNow Offline

This is a short description on how to improve GPS “cold start to GPS fix” time, primarily aimed at drone pilots using Betaflight or INAV. Though, once the GPS module is connected, the steps are identical, no matter which flight controller software (if any) is being used.

What You Will Need

  • An u-blox GPS module (at least version 6, which is ancient).
  • A free developer account on Thingstream.
    • It is free up to 20K requests per month (at time of writing).
  • The software u-center or u-center 2
    • Older GPS modules need the older version
  • A serial (USB) connection from your computer to the GPS.
    • With Betaflight (and possibly INAV) you can connect to the flight controller and have the GPS data getting passed through. This is the easiest option.
    • Some GPS modules have a dedicated USB port, that you can use as well.
    • Or you use an USB to UART adapter.

Step by Step

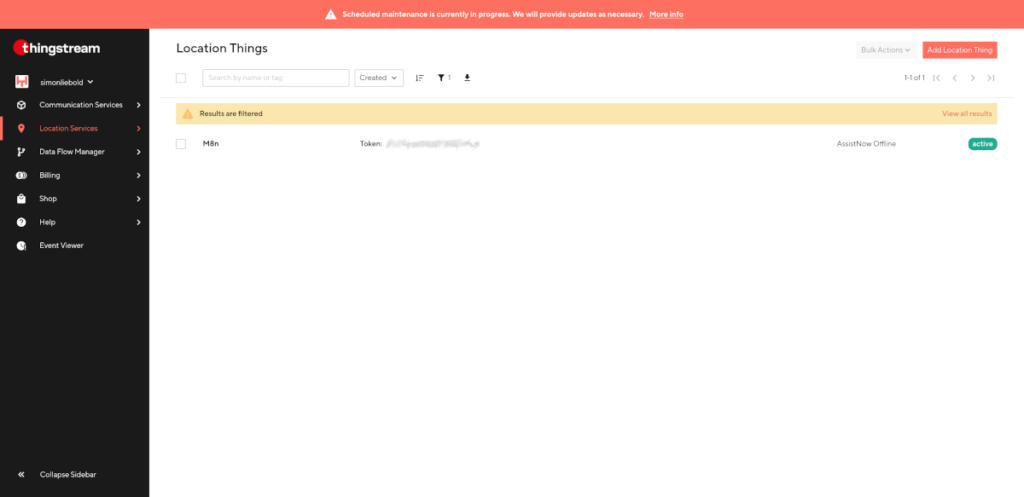
Register to thingstream and add a “Location Thing” (in Location Services). You will receive a token that you will need later. You can always come back and get the token from the site.

Then connect the flight controller to your computer.

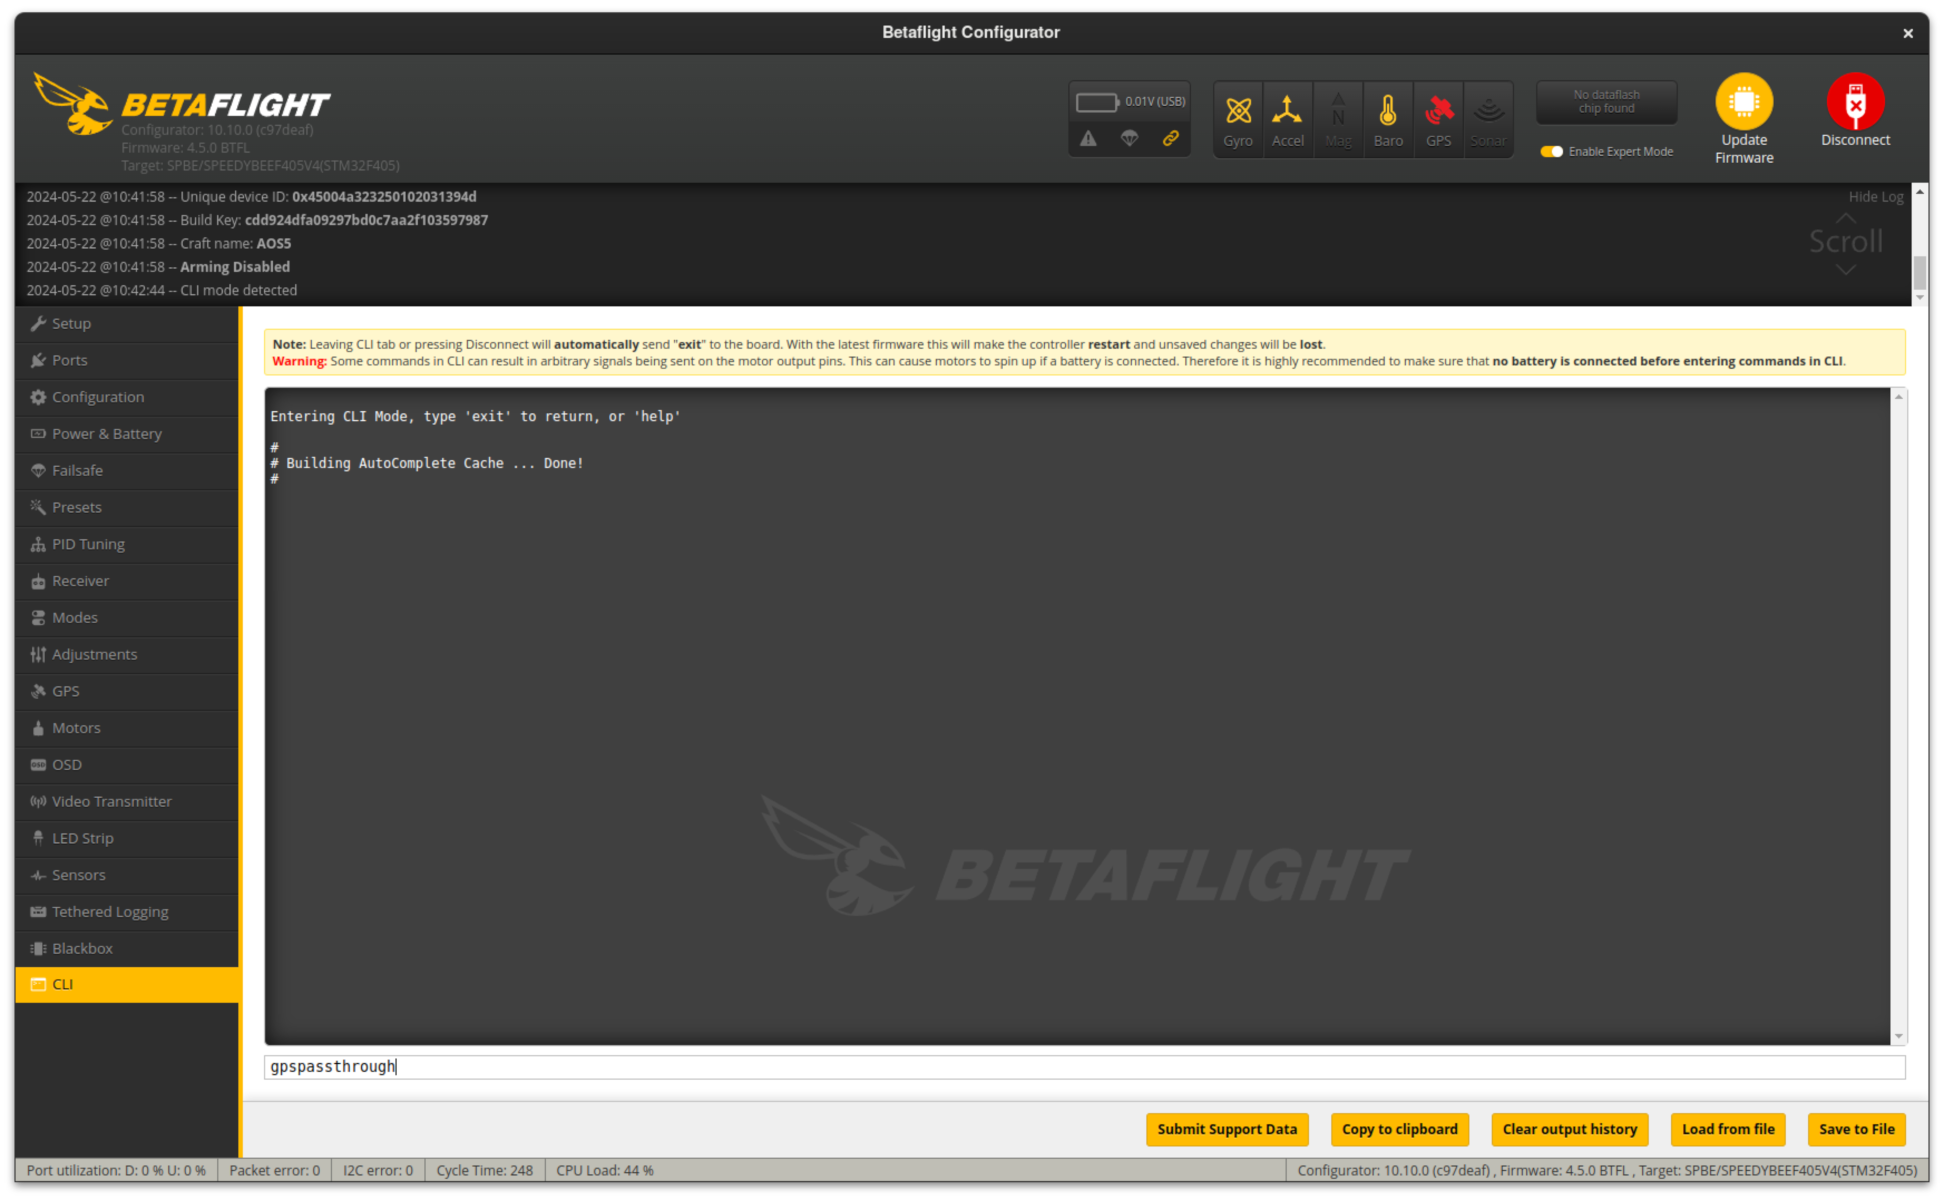
Start Betaflight Configurator (or the INAV equivalent) and go to the CLI tab. Enter gpspassthrough. Alternatively, you can enter serialpassthrough {UART number -1}, So, if the GPS is connected to UART 6, you would enter serialpassthrough 5.

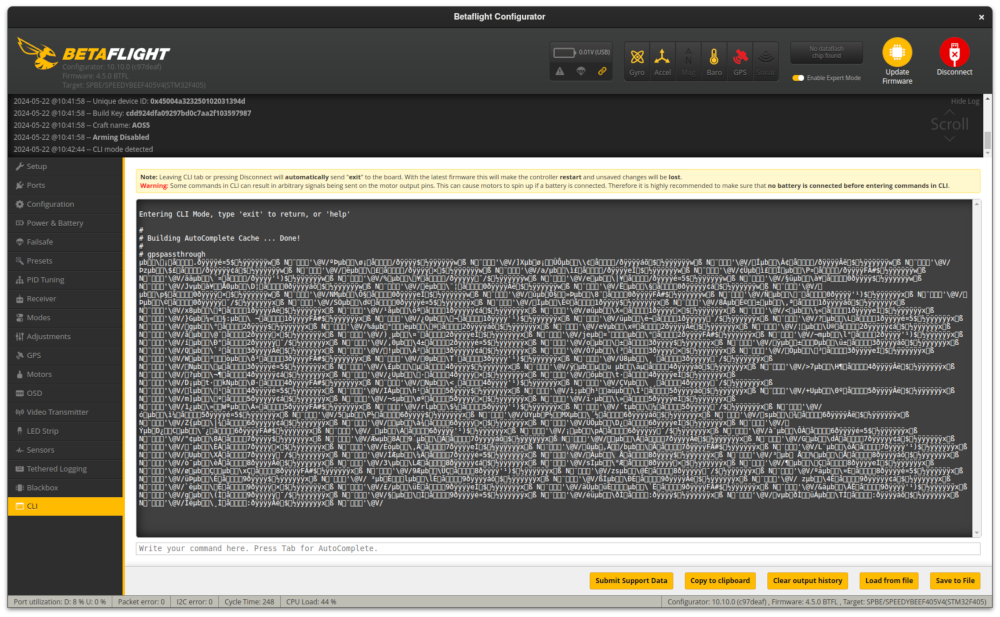
Once a lot of cryptic looking nonsense starts appearing all over the console, close the configurator window. Important: Just close the window. Don’t click the red Disconnect button.

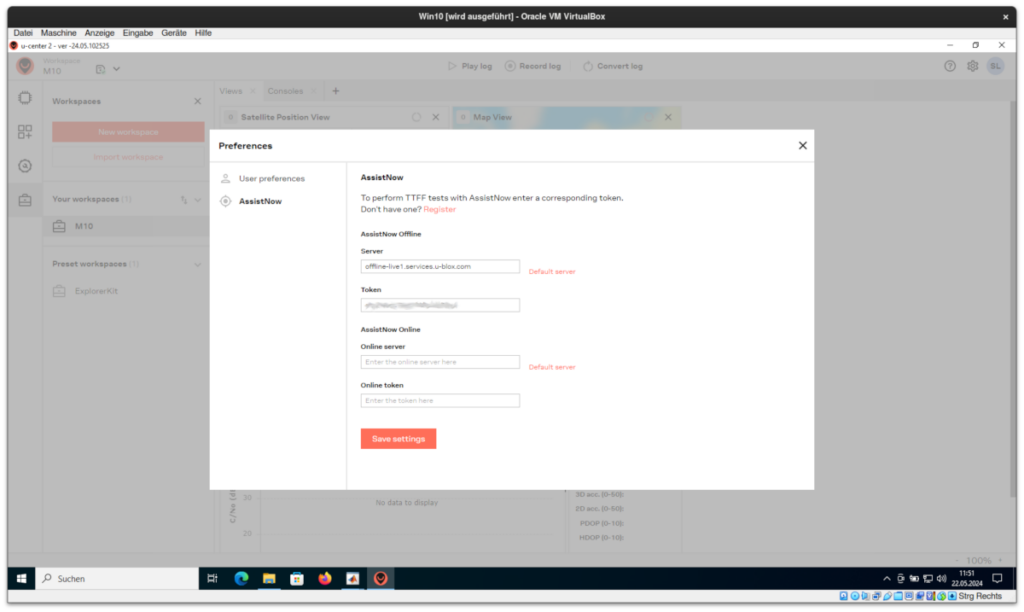
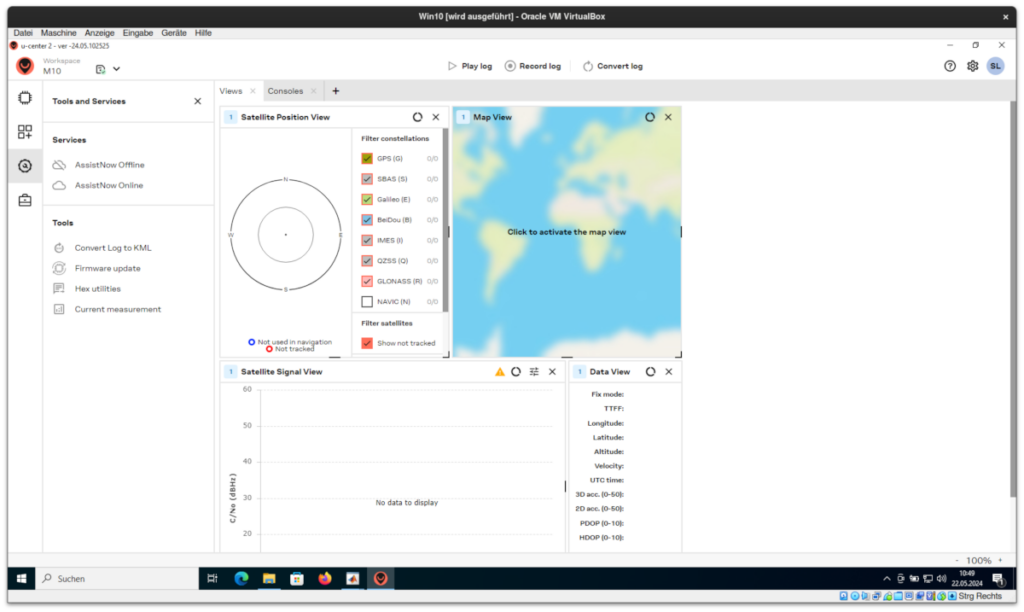
Now, start up the u-center (2) software. The following screenshots show u-center 2. The older version essentially works the same. Just the UI looks dated.

First use the cog wheel on the top right, to go into the preferences. Under the menu item AssistNow, enter the token from the ThingStream portal.

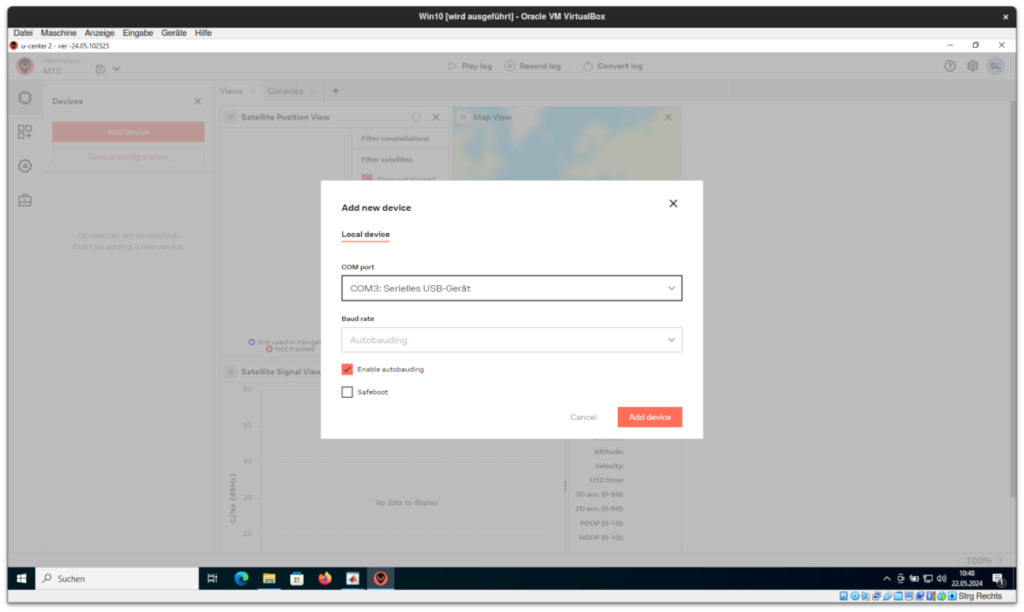
Connect to the Betaflight COM port. Usually there are just a few to try.

Once the GPS is connected to u-center, click on the left side on ToolsAssistNow Offline.

I usually pull 30 days of data. First click Download

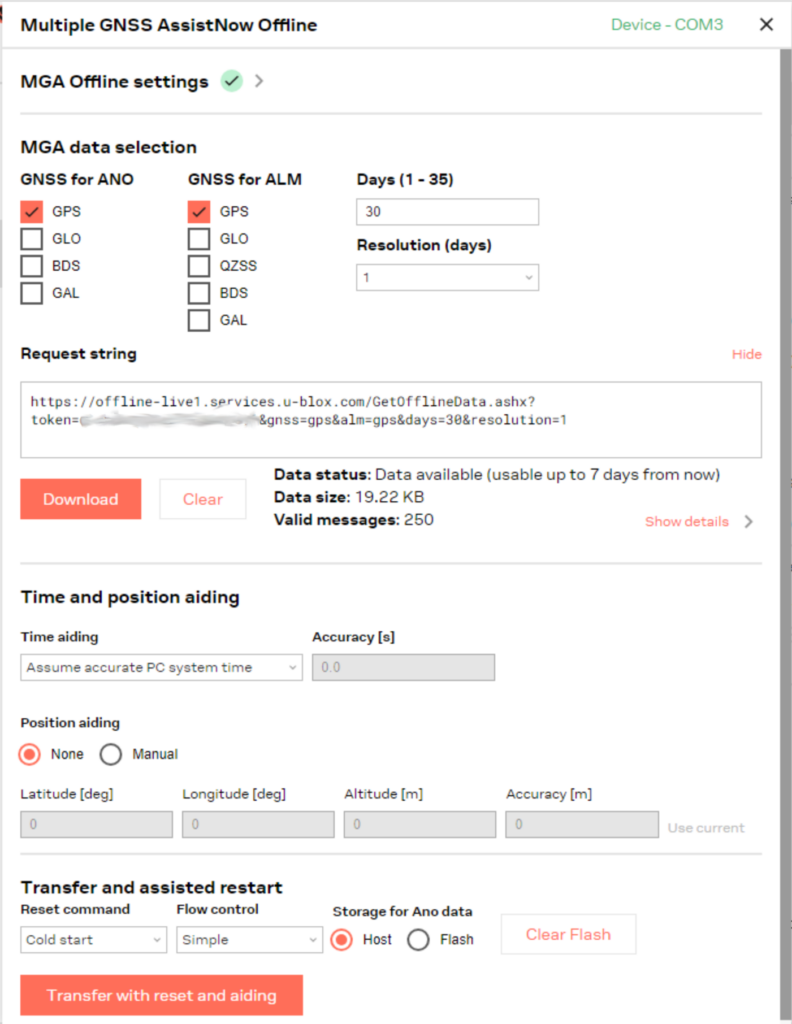
…and then Transfer with reset and aiding.

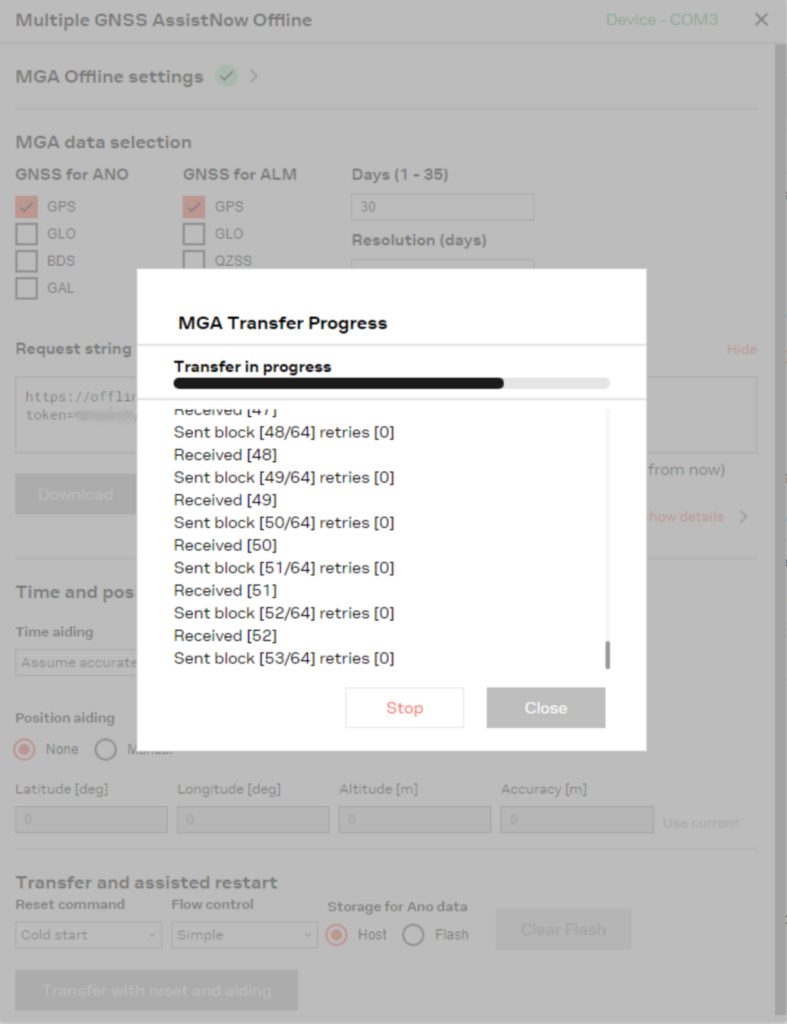
You are done! Disconnect from u-center and unplug your flight controller / GPS. The next start up in the field will be much faster to get the fix (seconds instead of minutes).

Dovecot Cheat Sheet

Just a collection of often-used commands with the IMAP server Dovecot, that will grow over time. It is not a complete Dovecot set-up guide.

Dovecot Add Users

This works only when using the Dovecot-internal user database. In my case, this is the file /etc/dovecot/users. Add the following helper script and save it as /usr/local/bin/dovecot_add_user.sh. Change the variable DOVECOT_PWD_FILE or the password hashing scheme SHA512-CRYPT if required. It needs to match the configuration in /etc/dovecot/conf.d/auth-passwdfile.conf.ext.

#!/bin/bash
# Helper script to add new users to Dovecot internal user database.
DOVECOT_PWD_FILE="/etc/dovecot/users"

[ $# > 0 ] || exit 1

echo $1:$(doveadm pw -s SHA512-CRYPT) | tee -a $DOVECOT_PWD_FILE

Set the executable bit:

chmod 755 /usr/local/bin/dovecot_add_user.sh

Add a new user like this:

dovecot_add_user.sh newuser@example.com

Allow Access to Shared Folder

Any steps to initially set up shared folders (in the shared/user@example.com/ namespace) are omitted.

The example below uses the following users:

  • owner@example.com – This user has permissions to grant access to the mailbox.
  • assistant@example.com – This user is granted access to the mailbox.
  • shared/user@example.com/INBOX – The mailbox that the assistant is granted access to.
doveadm acl set -u owner@example.com shared/user@example.com/INBOX user=assistant@example.com lookup read write write-seen insert

With the permissions above, the assistant cannot delete mails, but can mark them as seen and answered. See man doveadm-acl for details.

Display Access to Shared Folder

This displays the access granted for a particular mailbox.

doveadm acl rights -u owner@example.com shared/user@example.com/INBOX

Revoke Access to Shared Folder

This deletes an ACL on a particular mailbox. Afterwards the user assistant@example.com has no longer access to the specified mailbox.

doveadm acl delete -u owner@example.com shared/user@example.com/INBOX assistant@example.com

Remove Corrupted Message File

With sdbox mailbox format, if the logs indicate that a certain file is corrupted and cannot be read, here is how to get rid of this message:

doveadm expunge -u user@example.com MAILBOX INBOX UID 35835 

35835 in the example above is the ID of the corrupted file as seen in the logs. It is prefixed by u. like u.35835.

Linux: Restrict User/Group to Access the Internet only via VPN using Pyroman

On Linux, if you need to have a user or an application running with a dedicated user access the internet only if a VPN connection is active, you can do that relatively simply with a few firewall rules. One way is to use plain iptables statements. On Ubuntu, I’m using a iptables wrapper called Pyroman.

sudo apt-get install pyroman

In the example below, I am assuming that the system does currently not have any iptables rules in place. So, we are allowing any inbound and outbound traffic and are just restricting what matches the rule. So, in file /etc/pyroman/00_iptables-defaults.py we are commenting out the DROP defaults and replace them with ACCEPT lines.

# /etc/pyroman/00_iptables-defaults.py
# add_chain("INPUT",                     default="DROP")
add_chain("INPUT",                     default="ACCEPT")
# add_chain("OUTPUT",                    default="DROP")
add_chain("OUTPUT",                    default="ACCEPT")

Then connect to your VPN and see what network device it uses.

ip link

Also know the user or group name you wish to restrict. Then create a file in the /etc/pyroman/ directory with a name that makes sense to you. In my example, I call it 05_deluge.py.

# /etc/pyroman/05_deluge.py
iptables(Firewall.output, "-p tcp -m owner --gid-owner debian-deluged ! -o tun0 -j %s" % Firewall.reject)
iptables(Firewall.output, "-p udp -m owner --gid-owner debian-deluged ! -o tun0 -j %s" % Firewall.reject)

In the example above, I am applying the rule on the group with the name debian-deluged. Change it to your use case. Also change the device from tun0 to whatever device your VPN creates.

Here is another example using Nordvpn. Its client creates a device called nordlynx.

  • --uid-owner – Match a user ID.
  • --gid-owner – Match a group ID.

Now just make sure, Pyroman is enabled with every system boot:

sudo systemctl enable pyroman

Test it before relying on it! If you are using deluged, the same service as in my example, note that it needs a restart whenever the VPN connection is established:

sudo systemctl restart deluged.service

This could be automated at some point, I guess.

Dahon Seat Post Fix

I had the bike seat of my Dahon folding bike falling off while riding. It turned out that the thread of a custom made nut out of aluminium / aluminum had failed causing the whole clamp to come apart.

The custom nut was impossible to source. So I had to design my own. This model replaces this custom nut. All you need is a M8 nut and a M8 washer.

I printed a test version in TPA (white) and the real version in hard TPU (black). I used 50% infill and supports.

Slide the washer into the slot on the side. For mounting, it helps to glue the nut into place. The M8 screw (M8x50, in case you’ve lost it), needs to be screwed in fairly tight. I added a picture to show that the supplied screw isn’t too short (the screw’s threads extending over the nut are visible).

The design is available under the same name on Onshape, in case you want to remix it.

Find the model files on Printables.

VAG 7-Gear DSG DQ200 0AM Oil Change

The DQ200 (internal designation: 0AM) is a direct-shift gearbox for smaller cars from the VAG group. It has a reputation for not being particularly reliable with expensive repairs waiting to happen. But with some preventive maintenance this gearbox can last hundreds of thousands of kilometers and outlive the rest of the car.

The gearbox has two oil circuits. One for the gears and another one for the mechatronics (hydraulic oil). The manufacturer does not provide for any maintenance on the component. Nevertheless, it is good practice to change the oil(s) regularly.

  • Gearbox oil: Change every 60 – 100 thousand km
  • Mechatronics: Change every 8-10 years.

This is my personal schedule for our 2011 VW Polo V 1.2 TSI. It is actually not a lot of work and the improvements are noticeable. Afterwards the gear shifts are quieter and smoother.

What You Will Need

  • 1.7 liters VAG G 052 171 SAE 70W – 75 transmission fluid
  • 0.9 liters G 004 000 hydraulics fluid (some sources call for 1 liter) – if you intend to change it as well

Alternatively, you could get a kit with all fluids, a new drain plug and two venting nozzles included. But after using one of those, I found that the additional parts are not really required.

  • Socket wrench with various extensions
  • hoses in various diameters
  • A dedicated gearbox fluid filling device can come in handy
    • But I have seen people using just a funnel or filling it directly from the bottle.
  • Oil drain pan

Let’s Start

Raise the front of the car.

Or the whole car, if you have a car lift.

Remove the starter battery and the battery tray.

Disconnect negative first (black), then the positive (red). There are several screws holding the tray down. The rest just pops out.

If you are changing the hydraulics fluid, remove the starter.

The filling nozzle for the hydraulics fluid is underneath the starter. I have seen people using the forward facing venting nozzle for filling. But this didn’t work for me. You need to remove the electric connector to be able to access one of the screws. I needed a flexible extension for this.

Remove the panels under the car.

Remove the drain plug for the transmission fluid and drain it into a pan.

It’s the bigger one towards the back of the car.

Remove the drain plug of the mechatronics and drain the hydraulics fluid into a pan.

It’s the smaller plug towards the front of the car.

Close the drain hole for the transmission fluid.

Tighten with 40 Nm.

Close the drain hole for the mechatronics.

Tighten with 5 Nm + turn additional 90°.

Fill 1.7 liters of transmission fluid into the rear venting nozzle.

You need to remove the black cap and then attach a small diameter hose either into the nozzle or a bigger hose over it. In my pictures, you see the latter variant. This will take a while as air will come out as you try to fill in the fluid. Re-attach the small black cap onto the breather nozzle when done.

Unscrew the oil filler plug for the mechatronic.

It’s the small one towards the front of the car. You have to remove the starter to access it.

Fill in 0.9 liters of hydraulics oil.

Some sources say 1 liter. Use a small hose or funnel.

Put everything together

Put everything back together.

Lower panels, starter, plug, all hoses, battery tray and battery.

Go for a test drive and check for any leaks. It should shift much smoother now.

Wesco Trash Can “Silencer”

Avoids Wesco’s trash can sheet metal inserts scratching the floor when moving it around. Making it much quieter.

Really simple solution for a really annoying problem. I wonder why Wesco doesn’t supply something like this by default with its trash cans. The inserts out of sheet metal sit directly on the ground, thus making a horrible noise whenever the trash can is being emptied or moved around – preferably in the middle of the night.

Print a bunch of the feet out of a flexible material (TPU) and snap them on. They fit the insert of my Wesco “Kickmaster” trash can. I would expect that the relevant distances don’t vary with their other models. But I am interested to know.

Find the model files on Printables.

Mercedes OM 654 DIY Oil Change

Our 2019 C class Mercedes 220 d S205 has an OM 654 Diesel engine. Although the maintenance schedule (for non-dusty areas) calls for oil changes every 1y / 25,000 km (15.500 mi) (whichever comes first), I try changing the oil no later than 15,000 km.

Disclaimer: Here, I am describing my steps as an self-taught car mechanic. These explanations are not a Mercedes-approved guide. If you are unsure, go to your car repair shop.


What You Will Need

  • 6 liters of Mercedes approved engine oil
    • The 300 d needs 0.2 liters more oil. Possibly because of its Bi-turbocharger. The Sprinters need even more oil.
    • The non-hybrid versions of this engine can use 229.52, 229.61 or 229.71. If unsure, ask your local dealer or look onto your last maintenance invoice. In my case the car was previously filled with 229.52 oil. So that is what I continue to use.
  • An oil filter insert. Part number A6541801100.
  • An oil drain plug. Part number A00029902017. A plastic part.
    • The engine does not have an oil dipstick. So siphoning off the oil is not an option.
  • A way to get under the car. Either a car lift, ramps or two jack stands for the front.
    • Take this seriously! If the car comes down on you, you won’t be looking very happy any time soon. Get some help if you haven’t put a car onto jack stands before. Don’t kill yourself!
  • Tools for removing the lower engine cover (Torx), the oil filter housing (big hex nut) and the drain plug (wide slotted screwdriver).
  • A Light to see what you are doing.
  • An oil drain pan and a container for the old oil. Some rags and card board to prevent oil spills on the ground.
  • Measuring jug for filling the fresh oil.

Let’s Get Started

Drive the car to get up to temperature.

80° C coolant temperature.

Lift the car up.

To lift it up on jack stands, there is a dedicated lift point centrally between the front wheels. That is where you lift it with a jack and then lower it onto jack stands placed on the two dedicated points left and right. I found that it is enough to lift the front only. Make sure the jack stands are secure before getting under the vehicle.

Remove the air intake pipe from the air filter housing.

Unlatch the pipe left and right from the housing and bend it aside so you can access the oil filter housing underneath. Take care not to break the plastic latches (costs 200€ to replace the whole pipe). Unknowingly, we bought our car used with left latch already broken off, although it had been exclusively serviced by Mercedes-Benz dealerships…

Unscrew the oil filter housing.

Just unscrew it enough, so that the remaining oil in the filter can drain back into the housing.

Unscrew the oil filler cap.

See photo.

OM 654 oil filter housing underneath the air intake pipe
Underneath the engine, remove the engine covers.

First the middle one, then the rear one. Now the oil sump is accessible.

Move some cardboard and the oil pan underneath the drain plug and unscrew it.

Make sure your container can hold 6 liters. Let it drain for a while.

When drained, replace the drain plug with a new one.

Just turn until it clicks in. Mercedes requires to use a new plug. I’ve never tried reusing the old plug. This may or may not work. But it wouldn’t be according to the book.

Reinstall the lower engine covers.

First the rear one, then the middle one.

Replace the oil filter and the o-ring.

The filter pops off the cap. Then replace the o-ring on the cap that was supplied with the filter. The new filter pops onto the cap in the same way as the old one came off. While holding on the cap, insert the filter so that the little nose fits into the hole on the bottom of the oil filter housing. Tighten the cap with 25 Nm.

Reinstall the air intake pipe.

Make sure the two latches clip into place and the hose underneath is attached.

Fill with fresh oil.

For our C 220 d, the book calls for 6 liters. I know that the C 300 d has a slightly increased volume. Even more for Sprinters with this engine. This engine does not have an dip stick. So be careful to not overfill it. I usually fill in 5.6 – 5.8 liters and take the rest with me on the test drive.

With the hood still open, start the engine.

Look for any obvious leaks.

Take the car on a test drive.

In the service menu, check the oil level. This information will only come available once the engine/oil has gotten onto operating temperature. If required, fill additional oil in small increments (100-200 ml). Don’t overfill it!